Little Something Sunday with Karen Grunberg


Hi there. Today I wanted to share with you a new feature on the blog. We are going to be highlighting the design team member's favorite products, new and old alike, from the AMM store.
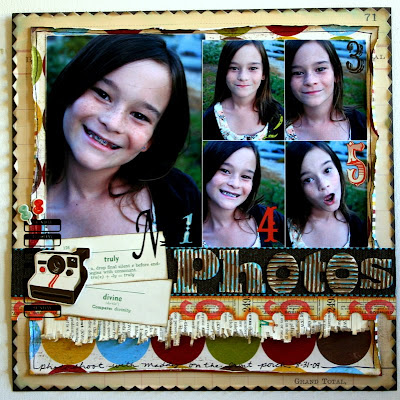
Our first designer I am going to highlight is Sasha Holloway. Sasha has a clean yet funky style. I love her use of circles, patterned papers, and small photos. Here are three of her top favorite products from the store.
1. Sassafras Lass Monogram Alphas from "Life at the Pole" collection. Now on sale for only $1.50!
2. Sassafras Lass "Penelope" patterned paper from the "Cherry Delicious" line. Have a look at her gallery here and I am sure you will be able to tell this girl loves Sassafras Lass.
I am so excited to announce our guest designer for next month is the super talented Katie Watson! Please help me welcome this AMM alumni back! Read on to learn a little more about her and see some samples of her work.
"My name is Katie Watson and I live in Southern California. I'm married to a Navy Pilot so we have traveled the country coast to coast calling many different states our home. I am a Mom to 3 children and 2 cats. I am on the Design Team for Maya Road which I Love, Love, Love!! I love vintage anything and everything...I would rather rummage than organize and am just plain happy when I'm doing some form of art! I love mini books and altered projects and would describe my style as shabby chic mixed with thrift store randomness."


Welcome to another Design Team Reveal-The Sketch Edition! This month we had great participation with our monthly sketch designed by Jeni Boisvert and I wanted to take a couple minutes to share with you the design team's interpretation of Jeni's sketch.
So first of all, here is the sketch one last time.
First we will start with Kat Glossop's layout. I love the punched circle border she gave this design.
"Original Beauty" by Kat Glossop

I wanted to take a couple minutes to say a big congratulations to our recent challenge and banner contest winners, Maria and Karla, and share their projects with you.
First up is this layout by Maria created for the February sketch challenge. She has won a collection of Shimmerz from design team member, Jeni Boisvert! Congratulations Maria!!
"Hear No Evil" by Maria Swiatkowski
Next is this awesome banner created by Karla Smith. It is actually a banner/mini book. It is so clever and beautifully put together.
"Girly Girl" Banner Album
USING GAUZE ON YOUR LAYOUTS
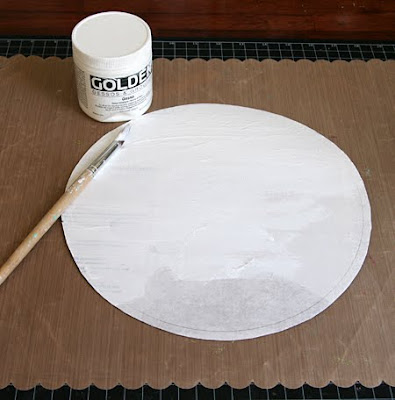
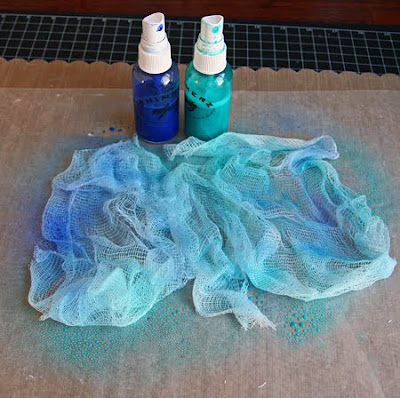
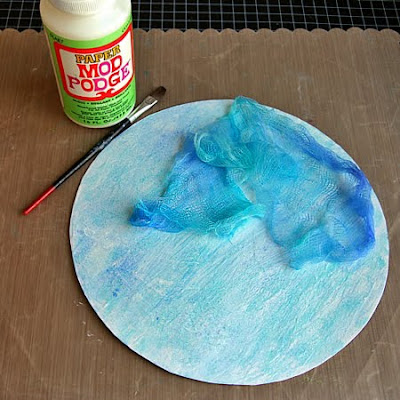
One of my favorite non-scrapbooking products to use on my pages is gauze. You can either use regular gauze like the kind you buy in the bandage aisle at the drug store, or you can use cheesecloth material (I found some cheesecloth-like material at a local specialty fabric/upholstery store).
I start with plain white gauze and spray it with one or more colors of Shimmerz Spritz. Once dry, the Spritzed gauze can be used as a fluffy photo mat or background for a title. Here are a few examples:



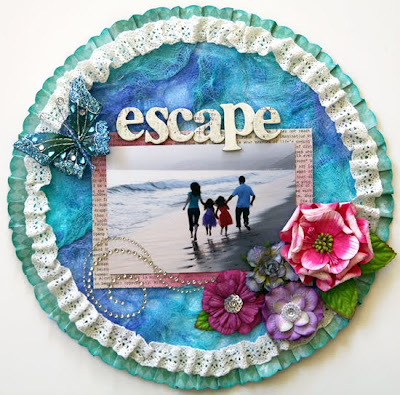
This week's Layout of the Week was chosen by Rachel Hall. She chose the layout below, "Magic by Rosângela Philippson.
Rachel said, "I love the texture that pops out of this design immediately in everything from the tearing to the handmade flowers. There is so much to look at on this layout from the flowers, to the layering of various patterned papers and the transparency butterflies, but Ro has pulled off the goal of every scrapper I have ever met, the balance of embellishments and techniques while maintaining a strong focus on her gorgeous photo. Such a gorgeous page that makes our wonderful gallery truly shine!"
"Magic" by Ro Philippson
How about a little interview with Ro to help us get to know this AMM newbie a little better. Read on to see what she had to say.
1.) How long have you been scrapbooking? I have been scrapbooking for five years. Initially it was a hobby that made me very happy, and now I also teach scrapbooking in my city and do events aroud my country.
2.) What are some of your favorite scrapbooking products? I love papers, and all that I can do with it: I can cute, mash, distress, tear, finally do everything that my creativity will allow. I also like paint, flowers and thickers.
3.) What inspires you? I find inspiration in the nature with its unique colors: the rain, a beautiful sunset, the sea... In a beautiful pictures with a story to tell, and also in the galleries that I always visit.
4.) What advice would you give to someone just starting scrapbooking or that you wish someone had told you when you started? My advice is: Don't be afraid of making mistakes, because in scrapbooking nothing is wrong. You are free to do whatever you want, spread your wings, you can!
5.) Besides scrapbooking, what other hobbies or interest do you have? I like to travel, read a good book and watch a good movie.
You can view more of Ro's gallery here or on her blog here. Be sure to leave her some love here on this post!
Quick and Easy St. Patrick's Day Cards
Materials Needed:
12x12 Kraft Cardstock
Green Cardstock Scraps
Heart Paper Punch
Rhinestones
Stamps
Ink
Fabritac
Bone Folder


Make a Mini Album in 2 Hours or Less!
I often times find myself with duplicate prints from favorite photo sessions that even though I may have already used the same photos on layouts, I can't bear to just toss into a box in storage. They are my favorites for a reason so they should be displayed in new ways rather than cast aside.
To solve this problem I came up with this easy and quick mini album made using items that I already had laying around and that I bet you do too!
Materials Needed:
4-6 pictures
cardboard
paint
glitter
chipboard
scraps of paper and/or cardstock alphabet stickers, chipboard, etc
binder rings (or something to hold the book together)
Instructions:
1. Decide how many pages your book will be. Since you are using a thick cardboard for your base I would suggest no more than 6 pages.
2. Pick your photos for your book. If you want to have a 6 page book, choose 5 pictures, a 5 page book will have 4 pictures and so on.
3. Cut your cardboard into 4"x6" pieces, cutting the number of pages you need for your book.
Peel the top flat layer off of one of each of your cardboard pieces. Don't worry about perfection, it's the imperfect look that makes the cardboard look so good!
4. Adhere your photos to the smooth sides of your cardboard pieces.
5. Adhere cardstock to the piece with no picture on it. This will be the back cover of your book.
6. Since I used "Counting My Lucky Stars" as the theme to my book, I used stars as my main embellishment. Choose your theme and use purchased chipboard shapes or cut your own. You will need as many chipboard pieces as you have pages to your book.
7. Paint the chipboard pieces in the color theme of your book. Let dry.
8. Cover chipboard pieces with glue and apply glitter. Let dry. (I also like to spray my glittered pieces with Krylon triple glaze before using so that I do not have glitter flakes everywhere!)
9. Using your scraps, cut small pieces of patterned paper to layer on each page (corrugated side). They will serve as the base for your glittered chipboard. I cut all of mine the same for a uniform and simple look that is eye catching and so easy to do quickly!
10. Adhere these pieces to each page (corrugated side).
11. When they are dry, add the glittered chipboard pieces to your pages, on top of the paper pieces (corrugated side).
12. Add your mini album title and words to the cover and each page (corrugated side).
13. Add journaling strips (corrugated side).
14. Punch two holes on each page on the left side. Add rings, ribbon, or twine to hold your book together.